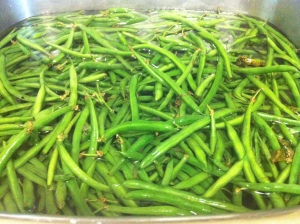
As the days have gotten ever so much cooler, I am panicking at the thought of fall. And not because of the impending winter … (Secretly… I kinda like the change in seasons and then there’s sledding! skating! drinking coffee while wrapped in a cozy quilt!). I am panicking, mostly, at the thought of how many things I want to still preserve, and how short that window of opportunity now is. So last weekend, on our weekly trip to Leslieville Farmer’s Market, we bought a big basket of green beans for the infamous ‘Picy Dilly Beans. Jim from Haystrom Farms was kind enough to let us pre-order it the week before, so it was waiting for us on arrival. Naturally, I had no time to do them until this weekend, but they kept really well in the fridge.
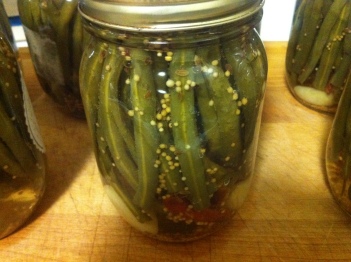
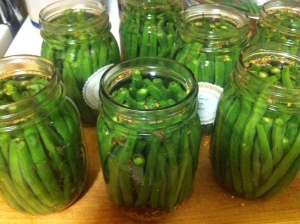
A few hours of washing, trimming, cutting, prepping, stuffing, and boiling later (whew!) and 7 beautiful jars of beans sat on the counter. These things are Ah-Mah-Zing in caesars (It’s their raison d’être, really). They’ll also do excellent double duty on a bread and cheese board, and, I imagine, quite well chopped up in tuna or chicken salad…. although, truthfully, we’ve never really gone past the caesar stage!
Now… the original recipe that I’ve used in the past came from Canadian Living and calls for dill heads (those flowering seed “flowers” that dill grows late in the season). I bought some, I kept them in water, and I put a bag over them to prevent the seeds from scattering across the four corners of my apartment. What I didn’t do… is use them the next day, change the water, or even look at them for the better part of a week. So when I finally pulled them out last night… womp womp… they were all mouldy.
What’s a girl to do? Why, use the dill seed in your spice cupboard, and maybe double up on the garlic to make them ‘Picy Garlicky Dilly Beans.
Lesson learned (not really…. I have a flat of tomatoes sitting on the kitchen table waiting for sorting).
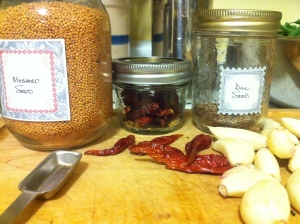
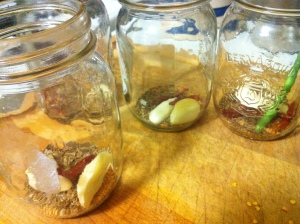
On with the show. You’ll also need mustard seeds, hot red peppers (fresh or dried), the aformentioned dill seed (or the real deal), and garlic!
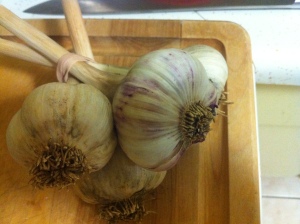
Look at this beautiful garlic from Healthy Choice Farms that I also picked up at the farmer’s market. I ❤ Ontario produce!
You know the stuff is fresh when it’s juicy and sticky as you peel it. I can’t wait to roast a couple of these babies up!
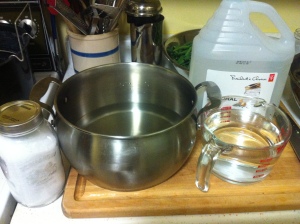
Alright, once you gather all your ingredients, you’ll also need some vinegar and some pickling salt (which I already had from last year… courtesy of Bulk Barn). Easy peasy, you just combine water, vinegar, and pickling salt.
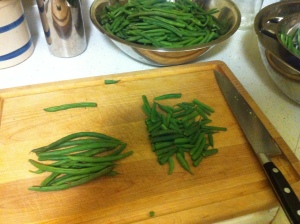
You’ll have already washed your beans, trimmed the stem end off, and cut them down to about 3.5 inches. I grabbed bunches, lined them up, and trimmed. (Keeping the trimmings to quickly steam and eat later… waste not, want not!)
You’ll notice my “Measurement Bean” at the top of the board in the photo above. I actually used a tape measure on it and then measured all the other beans against it. *shrugs*
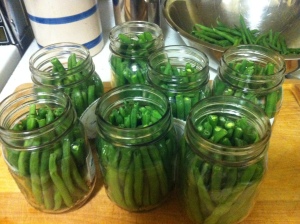
Wash and sterilize your jars in the hot water canner – I did a hard boil for 10 minutes. Remove and then fill in with your fixings. Garlic, mustard seed, hot peppers, and your dill (of either variety). Then cram in the beans. For this I tipped the jar a bit sideways and tried to line up the beans like little soldiers to get as many in as I could.
After your brine has boiled , use a funnel to pour it over the beans. Then use a butter knife around the edge of the jars to release any trapped air bubbles and top up.
On go your lids and back into the canner. A 10 minute boil later…. you have beans!
‘Picy Garlicky Dilly Beans
Adapted from Canadian Living
I also doubled this recipe. I find that when I do that, I get one less jar’s worth of brine. This made 7 500 ml jars for me.
Leave them for about 6 weeks for the pickling to take effect.
Ingredients:
- 2 lb green beans
- 4 small hot red peppers (fresh or dried)
- 4 tsp dill seed (or 4 head of fresh dill)
- 4 -8 cloves garlic (depending on your preference)
- 4 tsp mustard seeds
- 2-1/2 cups water
- 2-1/2 cups white vinegar
- 2 tbsp pickling salt
Method:
- Wash, trim and cut your beans down to 3.5 inches in length.
- Wash and boil your canning jars to sterilize. Add hot water on your lids to soften them. (I learned to put them in water and simmer them gently, never boiling them)
- Into each jar, add 1 tsp mustard seeds, 1 tsp dill seed (or one head of fresh dill), 1 hot pepper, and 1-2 garlic cloves. Pack the beans in so they’re tight.
- Combine your water, vinegar, and pickling salt. Bring to a boil and simmer 3 minutes.
- Pour into your jars, leaving 1/2 inch of headspace. Insert a knife/spatula/chopstick/thin long object along the inside of the jar to remove any air bubbles. Wipe off the rim of the jar, add a lid and put the ring on, making it tight but not excessively so (fingertip tight, they call it)
- Put jars into canner, making sure tops are covered with water, bring to a boil, and process the jars for 10 min.
- Lift out of canner, trying not to tip them, or touch the lids/bands. Let cool.
- You should hear satisfying pops as the lids seal. When they’re cool, any that have not sealed should go in your fridge, and the rest are good for up to a year in your pantry. Leave for 6 weeks to pickle the beans.

